First Steps: Installing an RME Audio Interface on macOS 11 (Big Sur) and Later
This article guides you through the initial installation of an RME audio interface on Apple computers running macOS 11 (Big Sur) or newer. It covers hardware connection, device detection, driver selection, and macOS security requirements.
Connect the Hardware
Connect your RME audio interface to a reliable power source, if required by the device.
1. Connect the interface to your Mac using the appropriate data connection:
- USB
- Thunderbolt
- PCIe (via expansion chassis, if applicable)
2. Power on the interface.
3. Start your Mac.
Ensure that you are using certified cables and ports directly on the computer
(avoid hubs or adapters during initial installation).
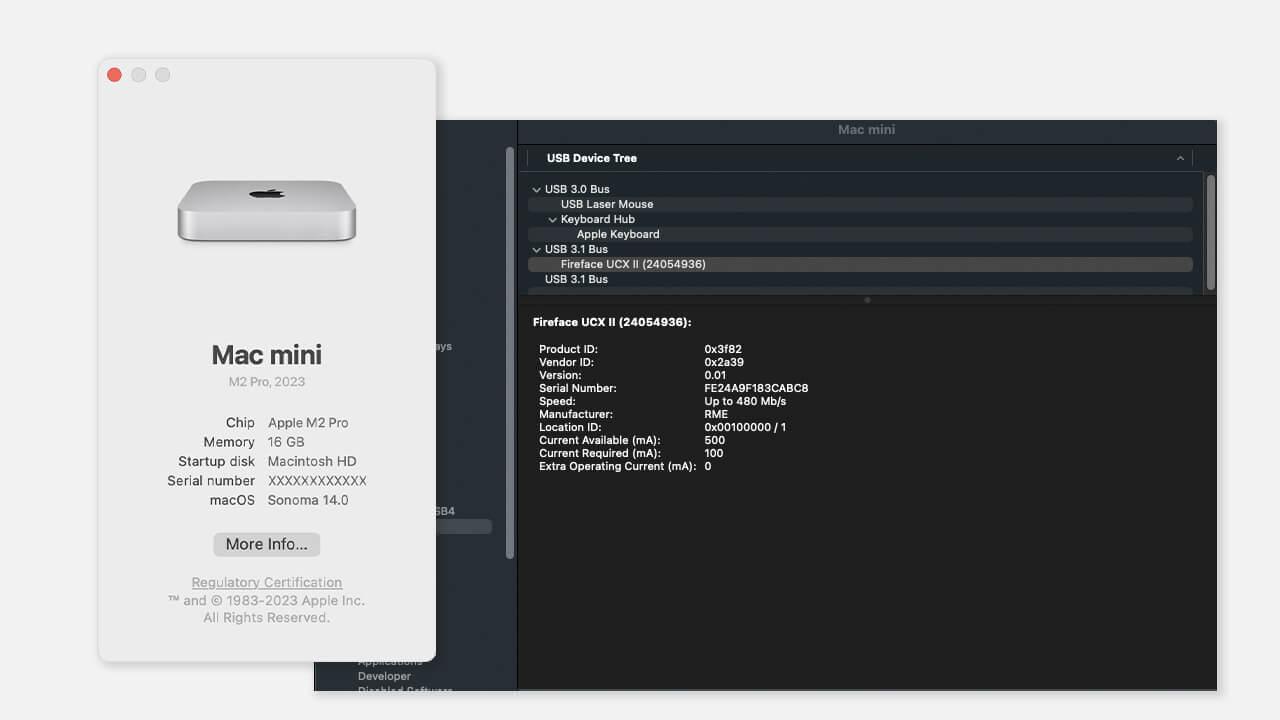
Check Device Detection in macOS
Before installing any driver, confirm that macOS can see the hardware.
1. Click the Apple menu (top left).
2. Select About This Mac → System Report.
3. Depending on the connection type, check one of the following sections:
- USB
- Thunderbolt
- PCI
Your RME device should appear in the corresponding list.
If the device is not visible, check cables, ports, power, and try restarting the Mac before proceeding.
Download the Correct Driver
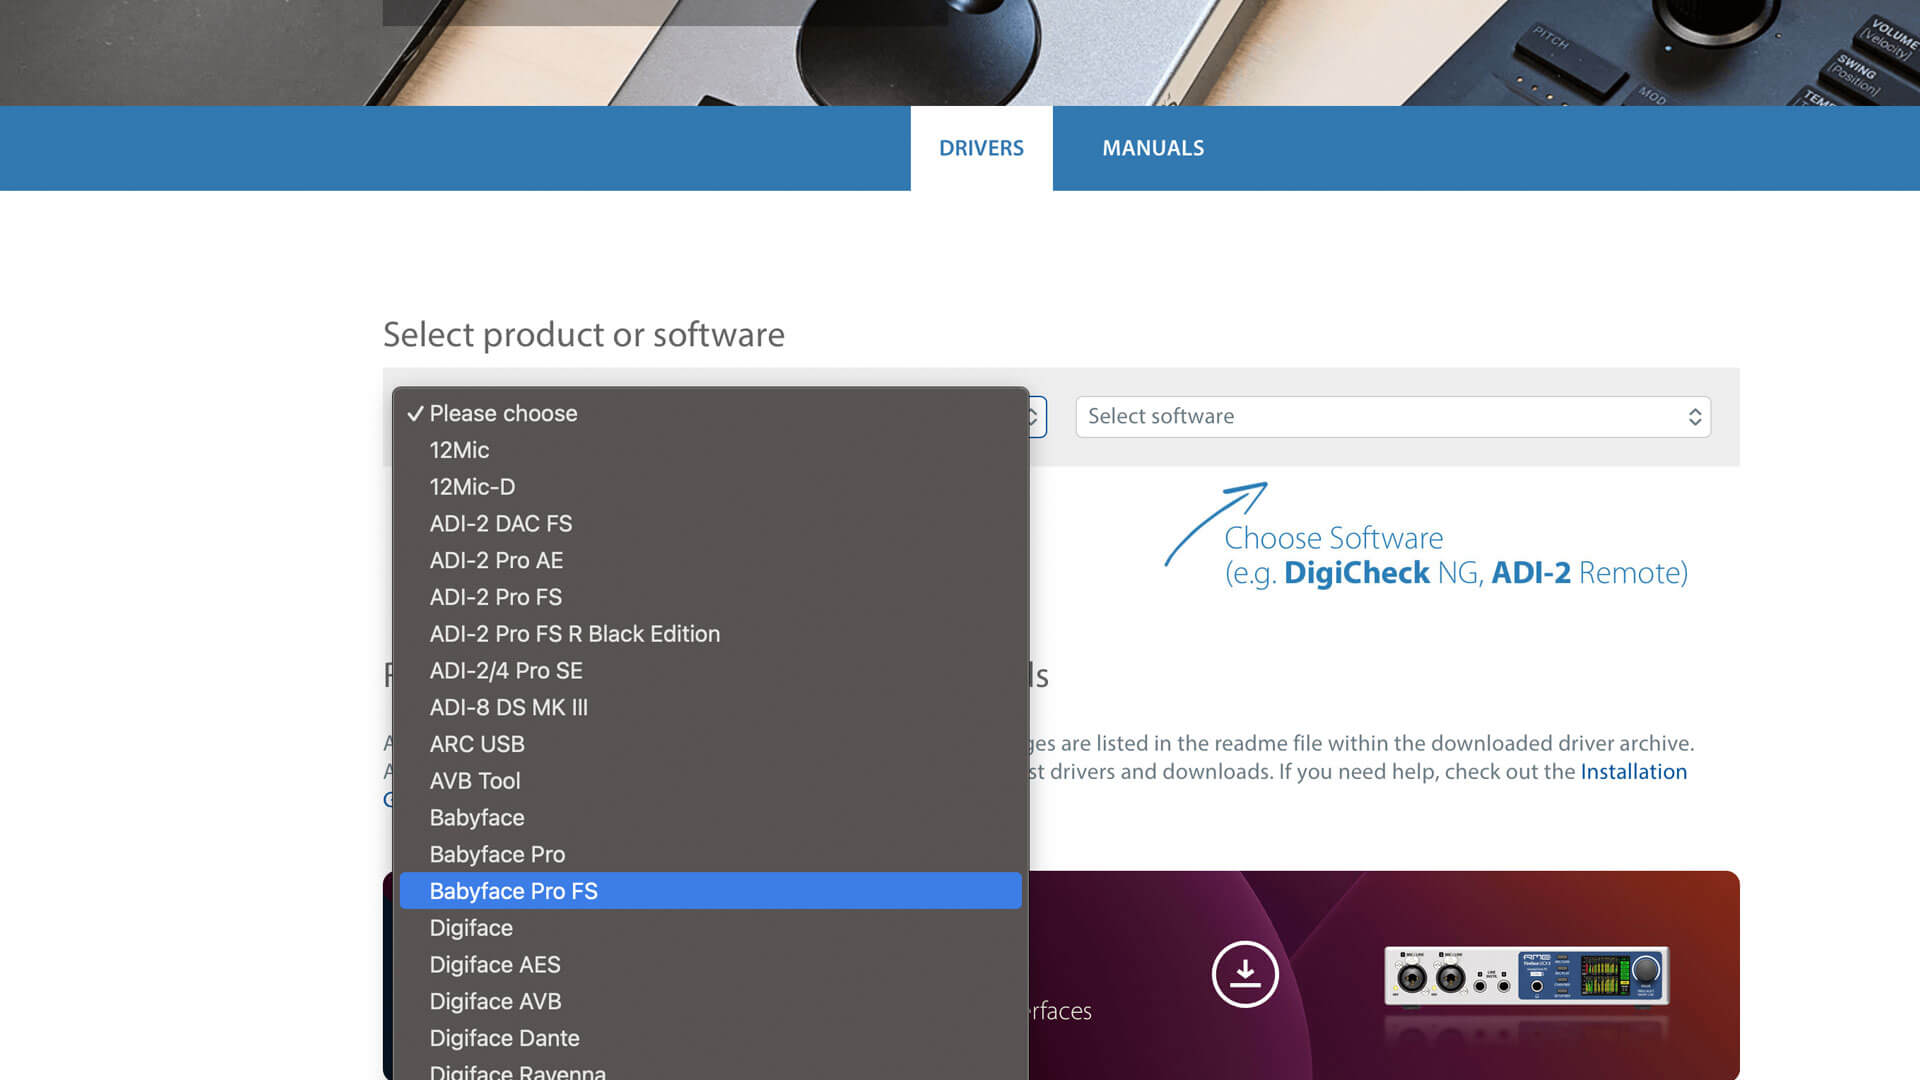
1. Open a web browser and go to the RME Downloads page.
2. Locate your product by selecting the device from the list.
3. Select the appropriate macOS driver.
You will typically be offered two driver options:
- Kernel Extension Driver
- DriverKit Driver
Each option requires a different macOS security procedure, explained below.
Driver Installation Paths
Option A: Kernel Driver (Legacy Method)
The Kernel driver offers maximum compatibility but requires reduced macOS security settings.
- Restart the Mac and boot into macOS Recovery:
Hold the Power button during startup (not necessary on Intel Macs).
The Kernel Driver requires reduced security on Apple Silicon (M1 and up). - Open Startup Security Utility.
- Select Reduced Security.
- Enable “Allow user management of kernel extensions from identified developers.”
- Restart the Mac normally.
- Run the downloaded Kernel Driver installer.
- Restart the Mac when prompted.
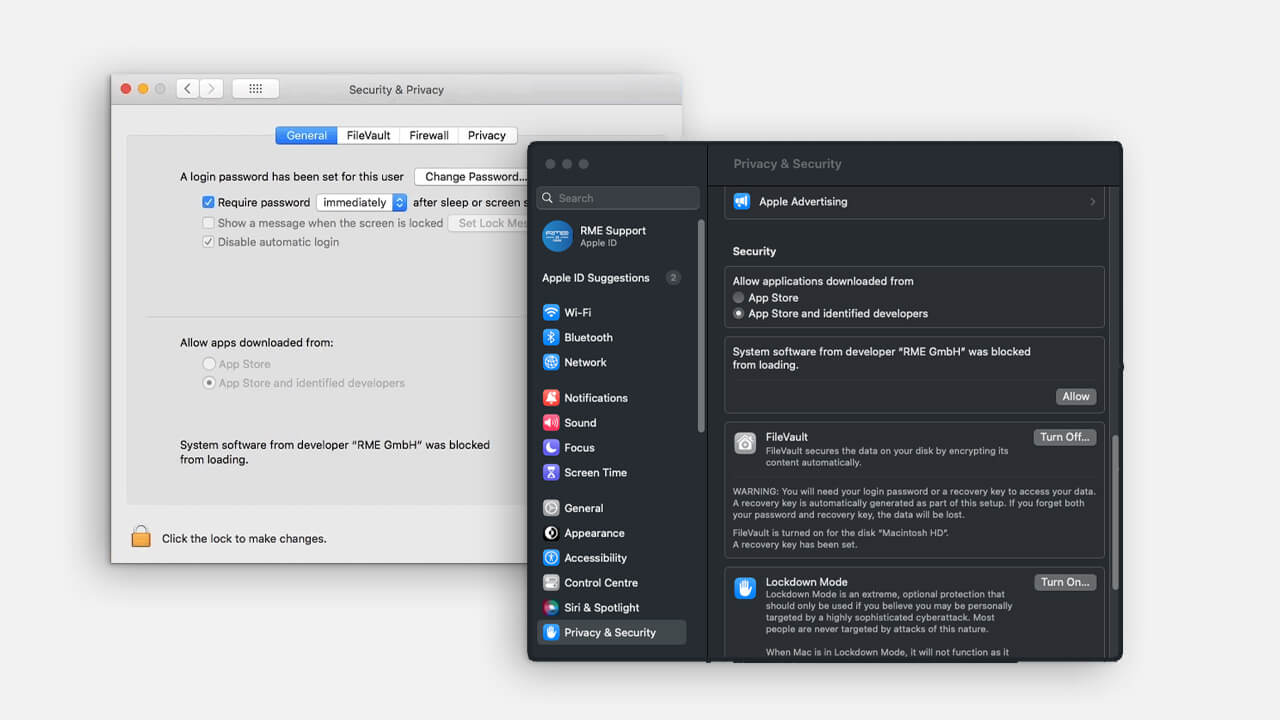
- After reboot, open System Settings → Privacy & Security.
- Click Allow next to the RME system software notification.
- Restart once more if requested.
The driver is now active.
Option B: DriverKit Driver (Recommended for Newer Systems)
The DriverKit driver follows Apple’s modern security architecture and does not require reduced security mode.
- Run the downloaded DriverKit Driver installer.
- During installation, macOS will prompt you to approve system extensions.
(Please note, the system settings may vary on different macOS versions.
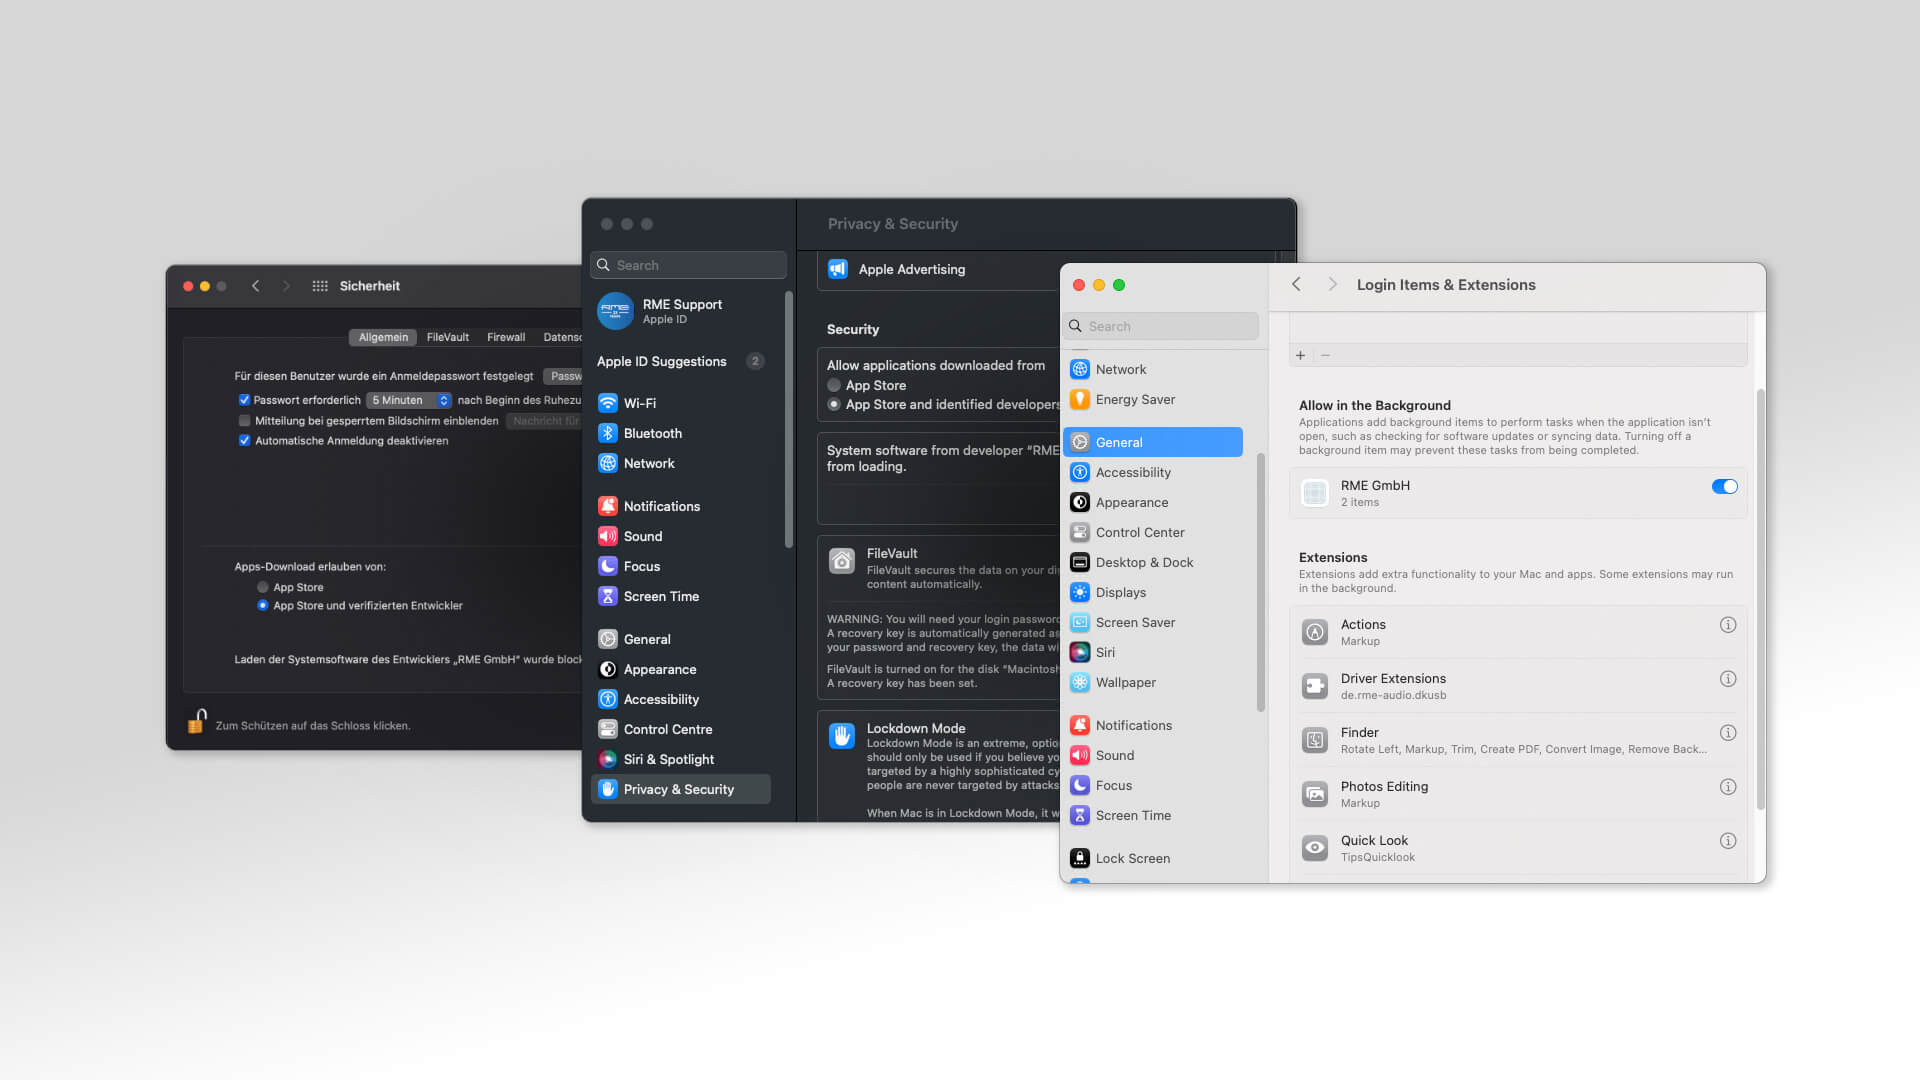
Check the detailed Installation Guide). - Open System Settings → Privacy & Security.
- Approve the RME extensions twice, if requested.
- Restart the Mac when prompted.
After reboot, the driver will load automatically.
Verify Successful Installation
After restarting:
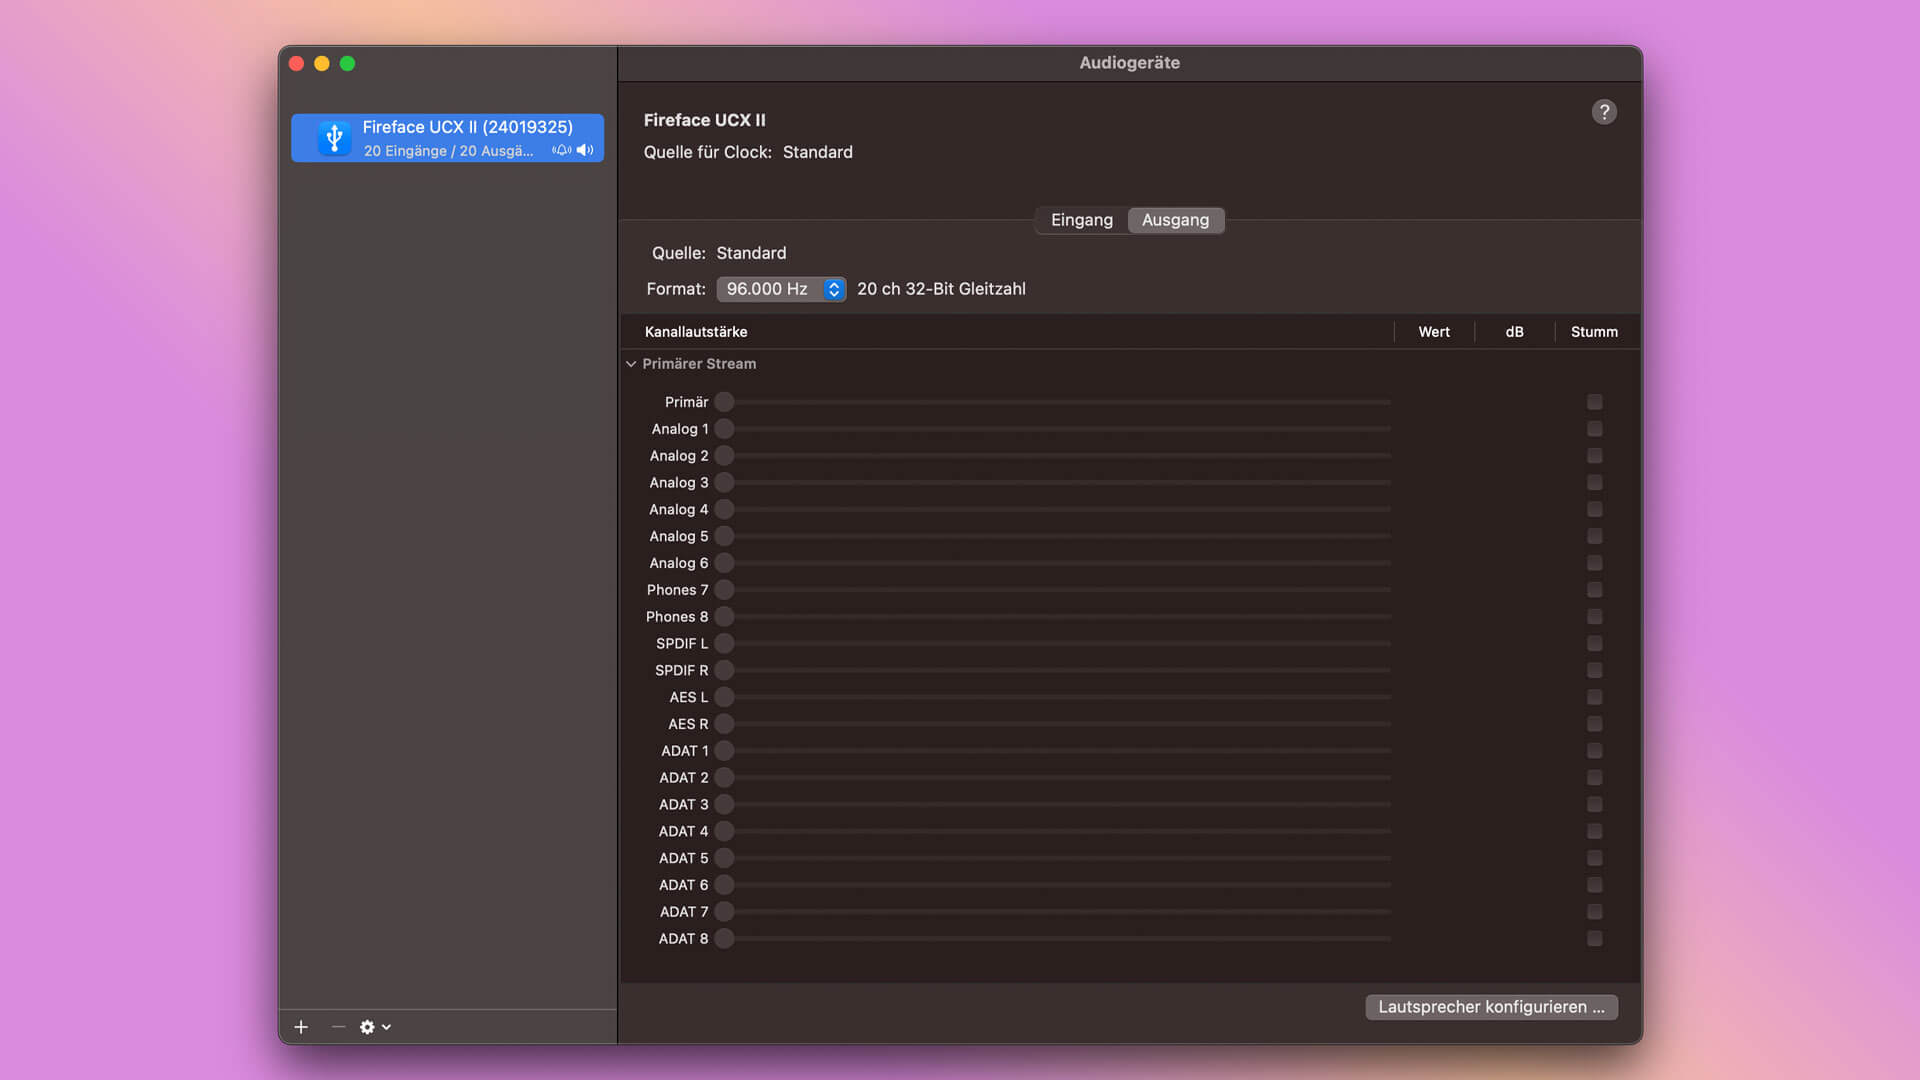
- The RME device should appear in Audio MIDI Setup.
- TotalMix FX (if applicable) should launch without error.
- Audio inputs and outputs should be available in your DAW.
If the Installation Does Not Work
If the device is not detected, the driver cannot be loaded, or macOS does not show approval options:
- Repeat the security approval steps carefully.
- Ensure you selected the correct driver for your macOS version.
- Try a different cable or port.
If the issue persists, please contact RME Support with the following information:
- macOS version
- RME device model
- Connection type (USB, Thunderbolt, PCIe)
- Description of the problem

Downloads
All up-to-date Drivers
Firmware, Driver and Software Downloads for the current RME Audio product line.